3 Efficient Ways to Download Netflix Movies on Mac
Are you wondering how to download Netflix movies or shows on your Mac so as to watch them when the internet is limited or expensive? Well, you are in luck, below we will show you 3 efficient ways to help you watch Netflix movies, TV shows, or more offline on your Mac. Now, enjoy it.

Netflix on Mac: When and Why?
Before we get started to show you how to download Netflix movies or shows on Mac, you may wonder when Netflix land the offline feature on Mac and why it hasn’t done so until now..
When: Netflix has never released an official app for Macs, and as of 2023, there are no indications of one being released soon. Currently, the Netflix app is available only on Windows, Android devices, and the App Store for iPhone, iPad, and Apple TV.
Why: As for the reasons behind this decision, Netflix has not provided an official explanation. However, there have been discussions among users that offer some possible insights.
- Netflix may have conducted research and determined that developing a macOS app was not deemed worthwhile, considering the significantly larger user base on Windows.
- Another consideration could be Apple's 30% fee for apps and in-app purchases, which would also apply to Mac App Store apps. To bypass this fee, Netflix may have opted to utilize the freedom offered by macOS to develop a web app without being subject to the arbitrary tax rule.
- The compatibility issue between Netflix's DRM technology, "Microsoft PlayReady," and Mac devices' "FairPlay" DRM system could be a factor. This incompatibility prevents Netflix from implementing the same level of DRM protection for downloaded content on Mac devices as it does on Windows devices.
Please note that these are user discussions and interpretations, as Netflix has not provided an official statement on the matter.
Method 1: Install Windows 10 or 11 on Mac
There are many options to install Windows 10 or 11 on Mac, here list two popular ways for you.
👉The first one is using Boot Camp.
Boot Camp is a built-in utility on Mac computers that allows users to install both Mac and Windows operating systems, allowing them to run Windows software directly on their Mac. With Boot Camp, users can select which system to boot into at startup, giving them the flexibility to switch between Mac and Windows as needed.
However, this method requires restarting the computer to switch between systems, which may not be convenient for users who require frequent switching. Additionally, installing the Windows system requires disk partitioning and sufficient hard drive space, so it's important to ensure that there's enough space available before proceeding with the installation.
Tutorial: How to install Windows 10 on a Mac using Boot Camp Assistant
👉The Second one is using virtualization software: Parallels Desktop and VMware Fusion.
Virtualization software allows users to run other operating systems, such as Windows, on a Mac by creating a virtual environment within the host operating system. Popular virtualization tools for Mac include Parallels Desktop and VMware Fusion.
It's worth noting that both of these tools require high system resources, including a fast CPU and ample RAM, to ensure smooth performance. Users also need to allocate sufficient storage space to create a virtual environment for their Windows system. Finally, virtualization tools may experience performance issues such as lag, delay, or crashing, so you should ensure that your computer meets the recommended system requirements for the virtualization software they choose.
Tutorial: How to install Windows 11 on M1/M2 Macs using Parallels 18
Method 2: Using Mac Netflix Downloader
FlixiCam for Mac is a professional Netflix video downloader for Mac users. Armed with the most advanced video downloading core, a concise and intuitive interface, and broad compatibility with macOS, the program enables users to download any TV shows, movies, documentaries, or more from Netflix and store them locally for offline playback.
Learn more about FlixiCam >>
The best Netflix Downloader on Mac that can help you download Netflix videos in MP4 or MKV format!
The output files are all in MP4 or MKV format, meaning that you can also move the downloaded files to your other devices and enjoy them anytime. Plus, it supports keep 5.1 surround sound, multi-language audio tracks as well as subtitles. With the help of this smart tool, you can easily save Netflix videos for viewing offline and without caring about any Netflix streaming limits.
Next, let's follow the detailed tutorial to download Netflix video on Mac with FlixiCam. Please download FlixiCam program first before getting started.
Tutorial: How to Download Netflix Video to MP4 on Mac
Step 1. Run FlixiCam on Mac
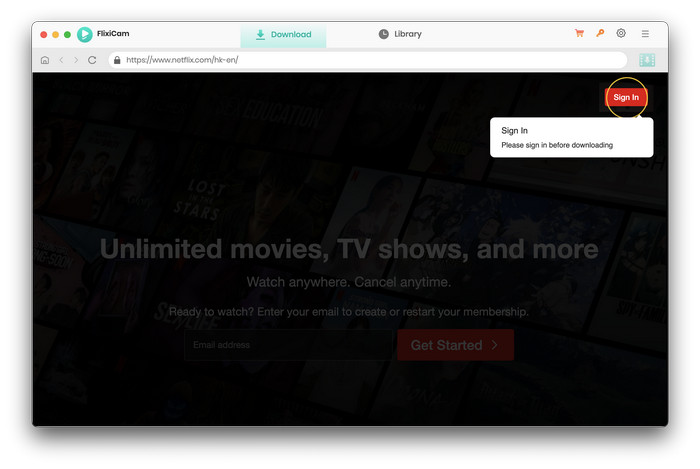
First of all, you need to log into your Netflix account. Please try to enter any word or video's name in the search box, then there will be a pop-up window prompting you to log in Netflix account.
Step 2. Customize Download Settings
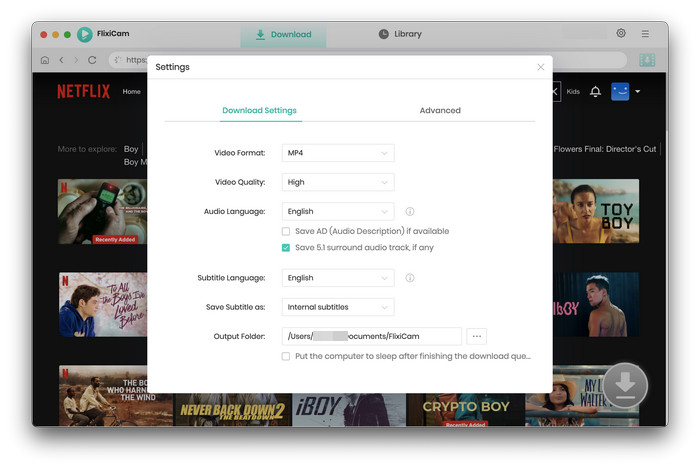
Now you can customize the download settings by hitting the Setting button on the upper right corner. The setting window will pop up, from where you can customize the output format (MP4 or MKV), output quality, output path, audio and subtitles language, etc.
Step 3. Search Videos on FlixiCam
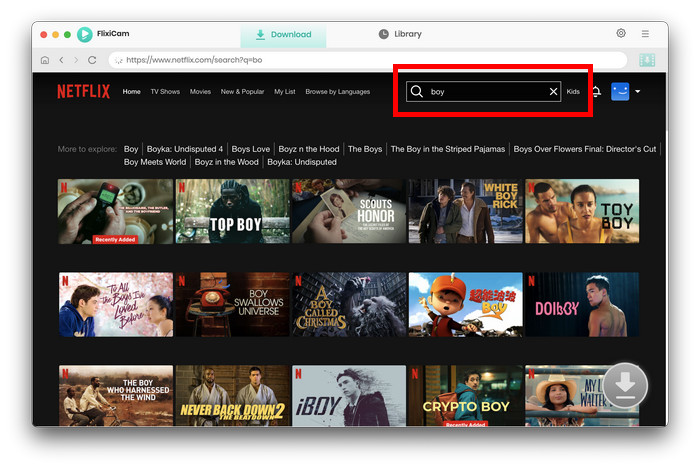
Please enter the name of movies & TV shows or copy and paste the link of videos from Netflix Web Player to FlixiCam, and then click the little magnifier icon, followed that the program will list the video or all of the related video.
Step 4. Select Audio Track and Subtitle
FlixiCam's advanced download settings allow you to select the audio track and subtitle as needed. If you are trying to download a TV show, simply click the Download icon, followed that a window will pop up allowing you to select titles as well as seasons, and to choose audio track and subtitles by clicking "Advanced Download" in the bottom left corner. If you try to download a movie, please click the Advanced Download icon next to the Download icon to access the window.
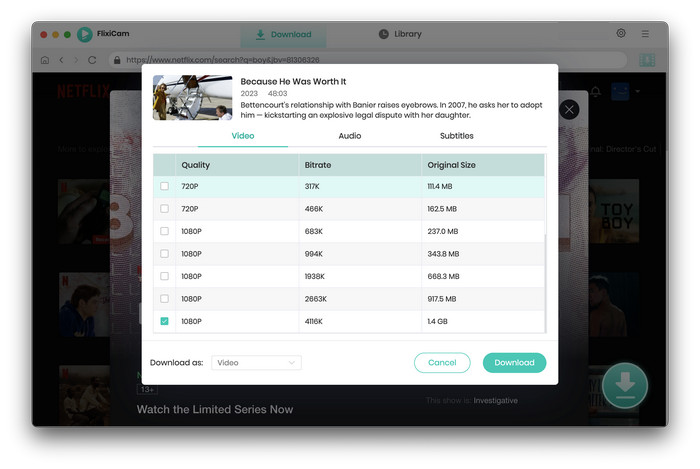
Step 5. Start to Download Netflix Videos on Mac
The final step is to tap on the Download button to start downloading the Netflix videos to the output folder you've chosen in the previous step. After downloading, you can click on Library to find the well-downloaded Netflix videos on local drive. Now you can store the downloaded videos on your computer and enjoy them anytime anywhere.
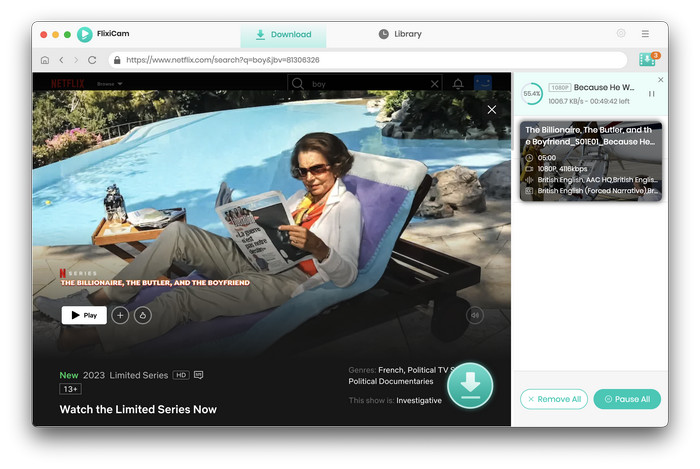
You may also like:
Method 3: Using PlayCover (M1/M2 Mac Only)
PlayCover allows you to run iOS apps on Mac. Here is how to install PlayCover on Mac and stream Netflix by using it.
Step 1: Download PlayCover from the official website and install it on your Mac.
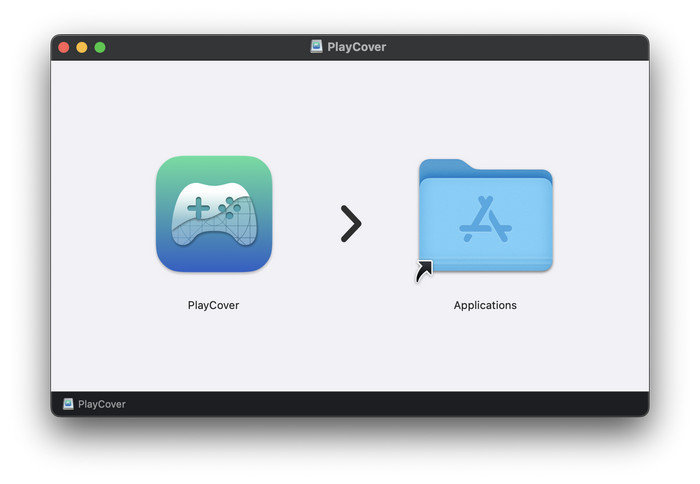
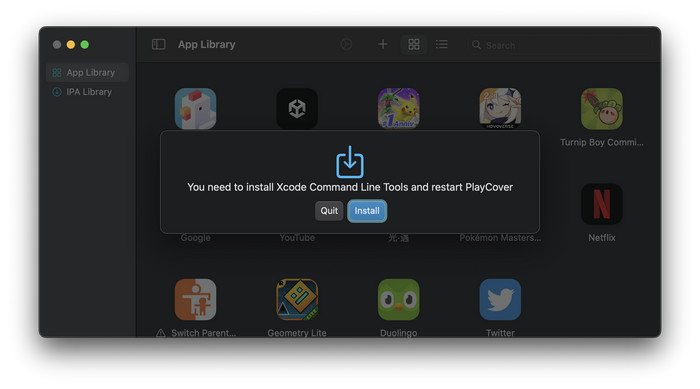
Step 2: When you first run the app, you may be prompted to install Xcode Command Line Tools. Follow the prompts to complete the installation, and authenticate with Touch ID as needed.
Step 3:Next, go to Decrypt or ARM Converter, and download a decrypted IPA file for the Netflix iOS app.
Step 4: Drag and drop the decrypted Netflix IPA file into the PlayCover window, or use the "Add app" button to select the .ipa file in Finder and add Netflix to your PlayCover library.

Step 5:Open the Netflix app and start streaming on your Mac.
Final Words:
Downloading Netflix videos on your Mac can be done through three efficient methods. You can choose the one that best suits your preferences. Remember, downloading Netflix videos should be done for personal use only and not for redistribution or piracy purposes.
 Download Win
 Download Mac
